
ClickWhale lets you create shortened links using your website’s domain and redirect visitors to any destination URL.
For example:
Original URL

ClickWhale Link
https://yourwebsite.com/summer-saleWhen someone visits the shortened link, ClickWhale automatically redirects them to the destination URL.
This guide explains how to create a shortened link, configure its settings, choose a redirection type, and verify that the redirect works correctly.
Before You Begin #
Before you begin, make sure:
- ClickWhale is installed and activated on your WordPress website.
- You have permission to manage ClickWhale links from the WordPress dashboard.
- Note: If you haven’t already, install & activate the ClickWhale plugin.
Create and Configure a Shortened Link #
- Log in to your WordPress dashboard.
- Navigate to ClickWhale → Links.
- Click Add New.
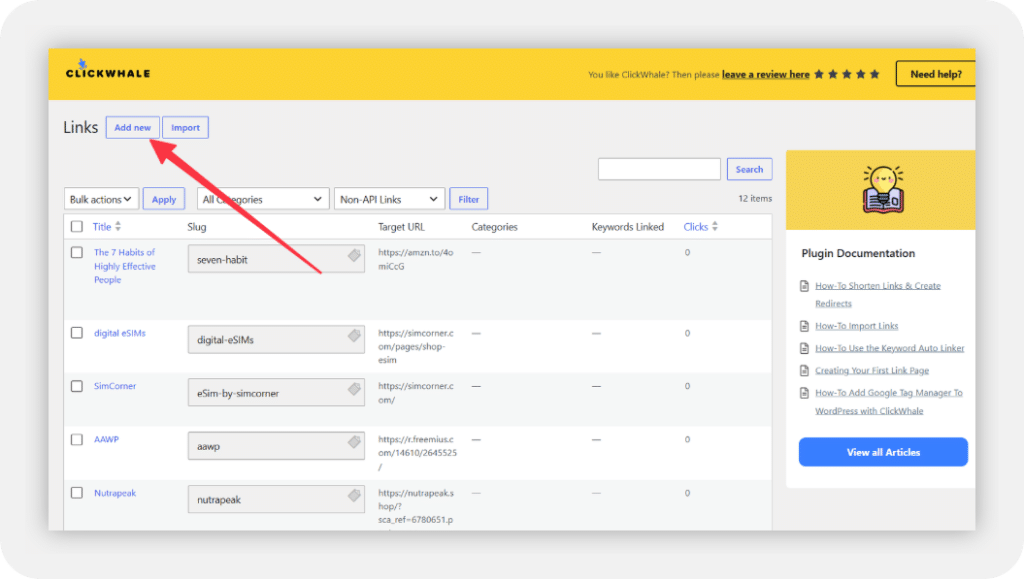
The Add New Link screen opens, where you can configure the shortened link.
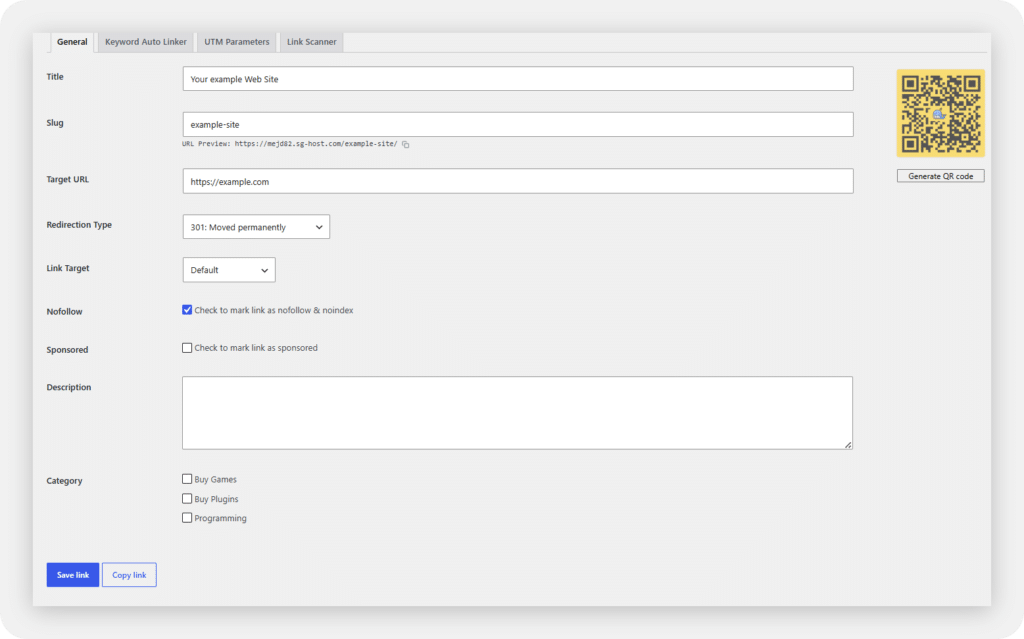
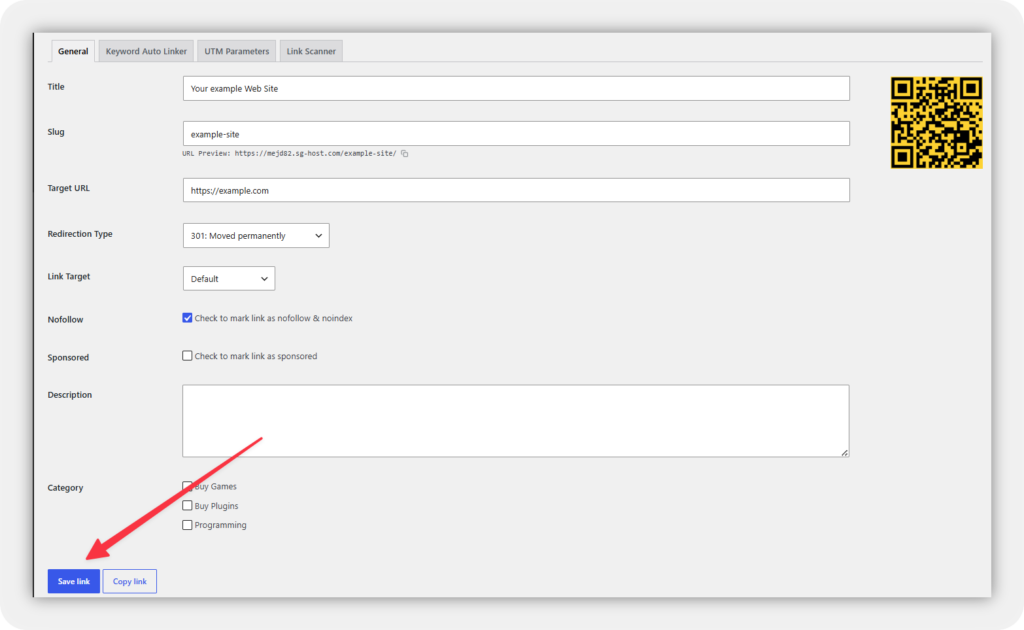
Title (Required)
Enter a descriptive name to help identify the link in your ClickWhale dashboard.
The title is used only for internal organization and does not appear in the shortened URL.
Slug (Optional)
Enter the text you want to appear after your website’s domain.
For example: summer-sale
creates: https://yourwebsite.com/summer-sale
If the field is left blank, ClickWhale may automatically generate a unique slug.
Target URL (Required)
Enter the complete destination URL where visitors should be redirected.
Include the full address, including https://.
Redirection Type (Required)
Select the HTTP redirection type for the shortened link.
The available redirect types are explained in the next section.
Link Target (Optional)
Choose how the link opens when ClickWhale displays it through supported content or features.
This setting does not change the redirect destination itself. The reviewer specifically recommends clarifying this behavior so readers don’t assume it affects every shortened URL.
Nofollow (Optional)
Enable Nofollow to add the rel=”nofollow” attribute to the shortened link.
This signals that search engines should not treat the link as a standard editorial endorsement, rather than stating they simply “do not follow” the link.
Sponsored (Optional)
Enable Sponsored for affiliate, sponsored, or paid links.
This adds the rel=”sponsored” attribute to the link.
Description (Optional)
Add an internal description to help identify the purpose of the shortened link.
Visitors cannot see this information.
Category (Optional)
Assign the link to one or more categories to organize related links.
Categories help you manage links but do not affect how redirects work.
Choose a Redirection Type #
Now that the user has reached the Redirection Type field, this section explains which option to choose, rather than repeating what the field is.
ClickWhale supports several HTTP redirection types to accommodate different use cases. Select the option that best matches how you want the shortened link to behave.
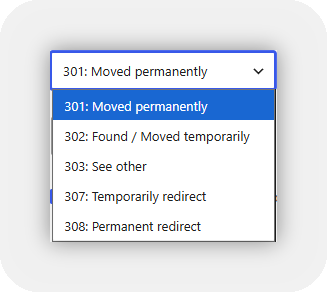
301 – Moved Permanently
Use a 301 redirect when the destination URL is permanent.
This is the most common option for shortened links that will continue pointing to the same destination.
302 – Found (Temporary Redirect)
Use a 302 redirect when the destination is temporary and may change later.
303 – See Other
Use a 303 redirect when visitors should be redirected to another page after completing an action, such as submitting a form.
307 – Temporary Redirect
Use a 307 redirect when the redirect is temporary and the original request method should be preserved.
308 – Permanent Redirect
Use a 308 redirect when the redirect is permanent and the original request method should also be preserved.
Configure Additional Link Features #
After configuring the basic link settings, you can use ClickWhale’s additional features to extend how your shortened link is managed and shared.
Some features are available directly from the link editor, while others become available after the link has been saved.
QR Codes #
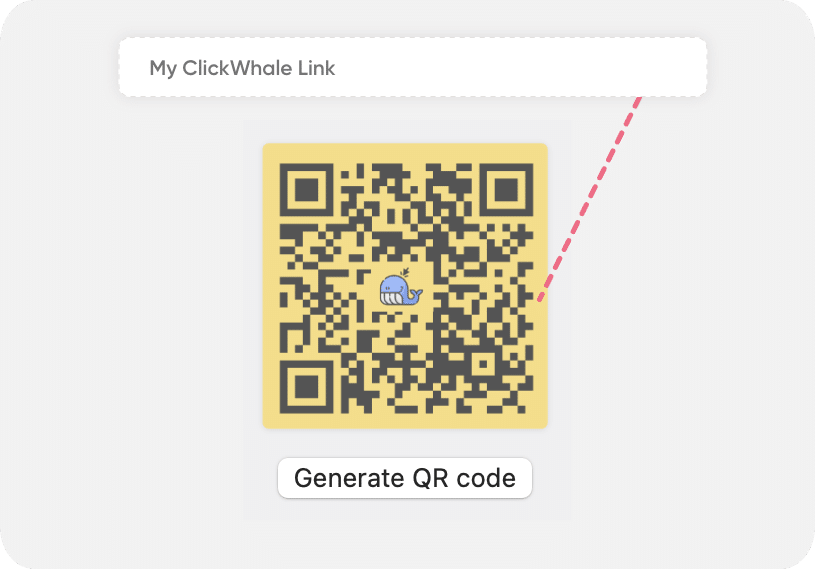
Generate a QR code for your shortened link to make it easy to share in printed materials, presentations, product packaging, or other offline content.
After saving your link, open the QR Code section to generate and download the QR code.
For detailed instructions, see How to Create QR Codes for Links.
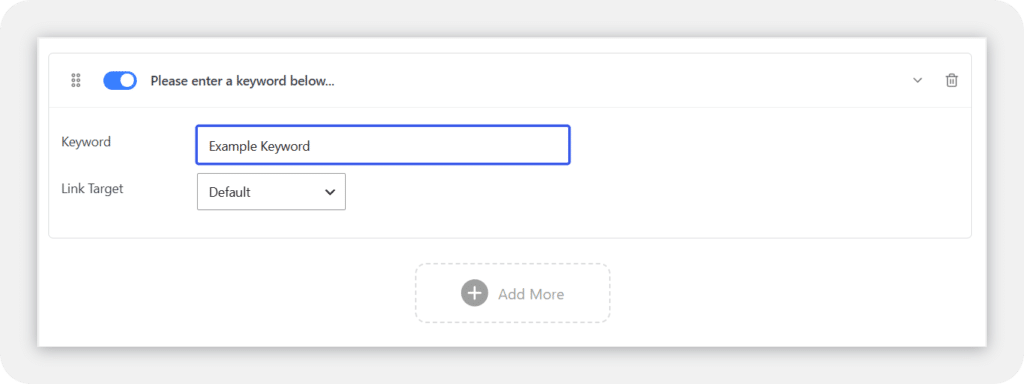
Keyword Auto Linker #
Use the Keyword Auto Linker to automatically connect selected keywords in your WordPress content to this ClickWhale link.
This feature can automatically link keywords to internal, external, or affiliate destinations without manually editing each post.
For complete setup instructions, see How to Use the Keyword Auto Linker.
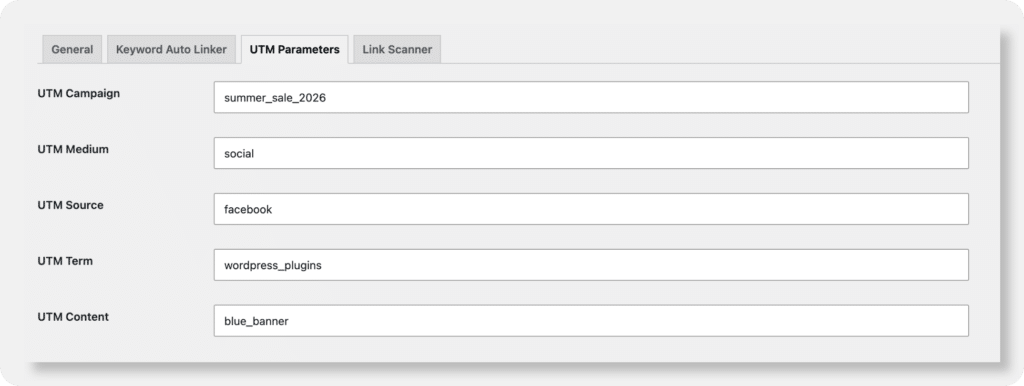
UTM Parameters #
The UTM Parameters feature lets you append campaign tracking parameters to your destination URL.
This helps you identify traffic sources and marketing campaigns in analytics platforms.
For more information, see Create UTM Links with the ClickWhale Link Builder.
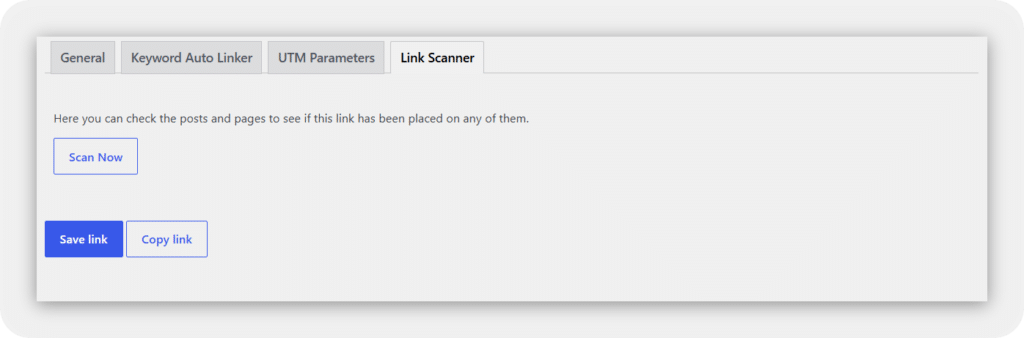
Link Scanner #
Use Link Scanner to find where manually inserted ClickWhale links appear throughout your WordPress content.
This makes it easier to review, update, or manage existing links across your website.
For more information, see Understanding Link Scanner Results.
Save and Test the Link #
After reviewing your settings, click Save Link to create the shortened link.
FAQs #
What is the difference between the slug and the target URL?
The slug is the custom text that appears after your website’s domain in the shortened URL.
For example:
Slug: summer-sale
Shortened URL: https://yourwebsite.com/summer-sale
The target URL is the destination where visitors are redirected after opening the shortened link.
Which redirection type should I use?
Choose the redirection type based on how long you expect the destination URL to remain the same.
- 301 – Use for permanent redirects.
- 302 – Use for temporary redirects.
- 303 – Use after actions such as form submissions.
- 307 – Use for temporary redirects that preserve the original request method.
- 308 – Use for permanent redirects that preserve the original request method.
For most shortened links, 301 and 302 are the most commonly used options.
Can I change the target URL later?
Yes. You can edit an existing ClickWhale link at any time and update its destination URL.
After making your changes, save the link to apply the updated destination.
Will changing the target URL affect the shortened link?
No. Updating the target URL changes only where the shortened link redirects visitors.
The shortened URL remains the same unless you also modify its slug.
How can I confirm that the redirect works?
After saving your link:
- Copy the shortened URL.
- Open it in a new browser tab or an incognito window.
- Verify that it redirects to the correct destination page.
If the redirect does not work as expected, review the Target URL and Redirection Type settings before saving the link again.
Can I disable click tracking for one specific link?
Click tracking is currently managed through the global ClickWhale tracking settings rather than individual links.
To change your tracking preferences, navigate to: ClickWhale → Settings → Tracking
For more information, see How to Enable or Disable Link Tracking.
Can I edit or delete a shortened link?
Yes. Go to ClickWhale → Links, locate the shortened link, and select Edit to update its settings or Delete to remove it.
Deleting a link permanently removes the redirect, so any existing shortened URLs pointing to that link will no longer work.


